How to Use the IF Statement in Power BI?
Introduction to Power BI IF Statement
IF is the most popular statement in Excel & Power BI. Arriving new columns based on multiple conditions is almost impossible without IF Statements, so one needs to be aware of if statements while arriving new columns.
Below are the different examples to use If Statement in Power BI:
Power BI IF Statement – Example #1
For an example look at the below data table for this demonstration. So you can download the excel workbook from the below link which is used for this example.
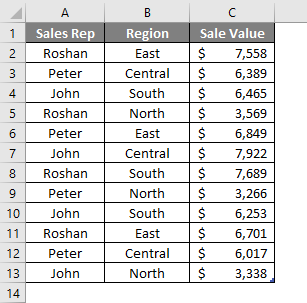
Now we need to add a new column “Incentive” based on certain condition and that condition is as follows.
“If the sales value is >6500 then incentive will be 300 or else incentive will be 200”.
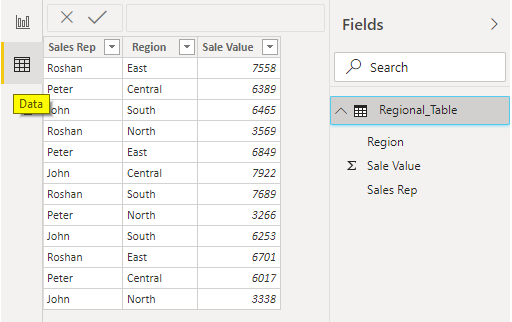
- Now I have already uploaded the above data table to Power BI Desktop file.
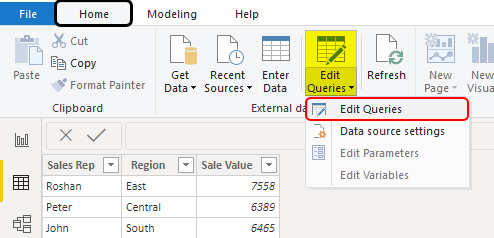
- Now we need to go to the “Power Query” editor to arrive conditional column. Under the Home tab click on Edit Queries.
- This will take you to the Power Query Editor window.
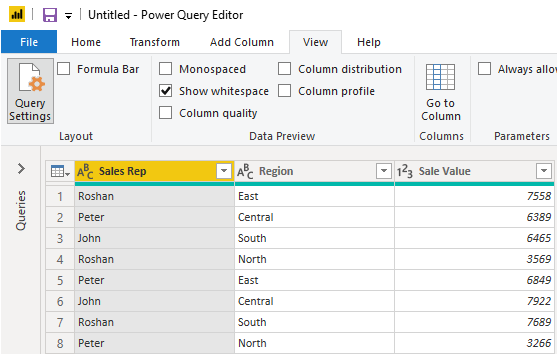
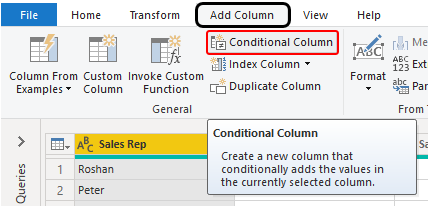
- In this new window go to the Add Column tab and choose Conditional Column.
- This will open a new conditional column criteria window as shown below.
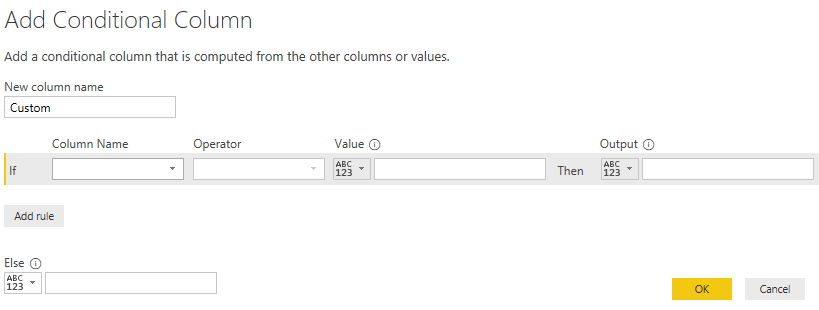
- First, give a name to this column as “Incentive 1”.

- After this, we can see that the if statement already exists, so from the “Column Name” drop-down choose the “Sales Value” column.
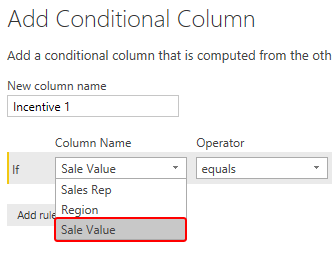
- Next, choose the operator as greater than (>).
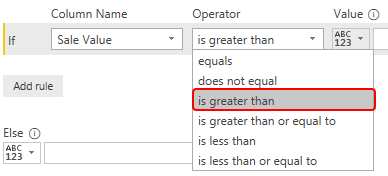
- Now mention the value as “6500”.

- Then the output will be an Incentive amount of 300.

- In the else statement add the incentive value as 200.

Now we can read this if statement with clear English i.e. “If Sale Value is greater than 6500 then Output is 300 Else 200.
This looks a lot easier than regular IF condition in MS Excel isn’t it??? Click on Ok to have a new conditional column.
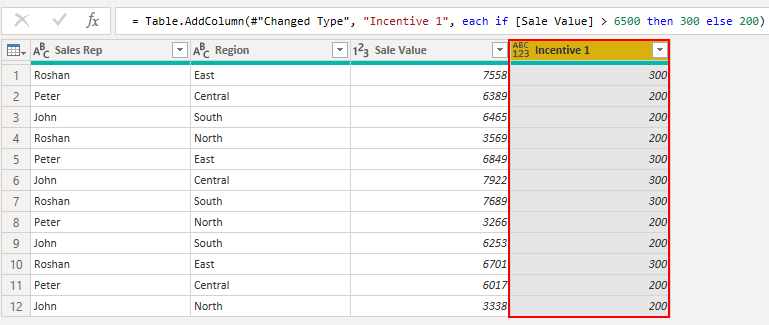
There you go we have a new column as “Incentive” based on the given if conditions in Power BI.
Power BI IF Statement – Example #2
Now we have seen how to use if statement to arrive at a new column. Similarly, imagine the situation of arriving a new column based on multiple conditions.
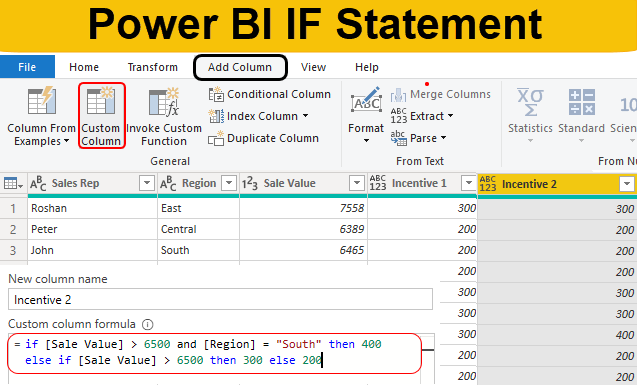
For example “if the sales value is >6500 and region is “South” then we need the Incentive value as 400 or else if the sales value is >6500 then the incentive is 300 or else 200.
- So, in this case, we need to use the “Custom Column” option.
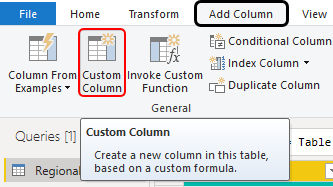
- This will open up the below window for us.
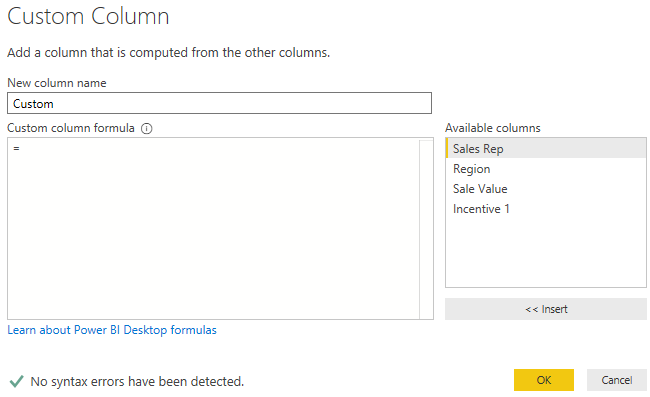
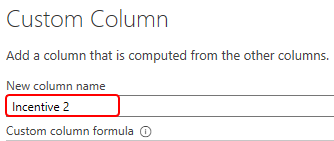
- As usual, give a name to New Column as “Incentive 2”.
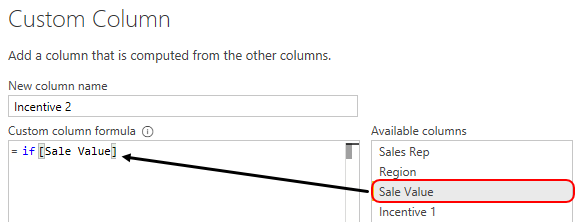
- Now in the “Custom Column Formula” space, we need to write the “if Statement”, so first write the if statement and chose the Sale Value column.
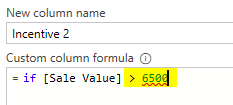
- The first criteria are if the sale value is >6500, apply this logical test.
- Now we need to apply one more logical condition as well i.e. if the region is “South”, we need to use AND statement here.

- Then the Incentive will be 400.

- Else if we need to do another logical test of whether sales value is >6500 or not, if yes then the incentive will be 300 or else 200. So apply one more if statement like the below.

Ok, in this statement first we will test whether sales value is > 6500 and region is “South’ or not if both are correct then the Incentive amount will be 400 or else again it will test whether sales value is > 6500 or not if yes then incentive will be 300 or else 200. Click on Ok to get the result.
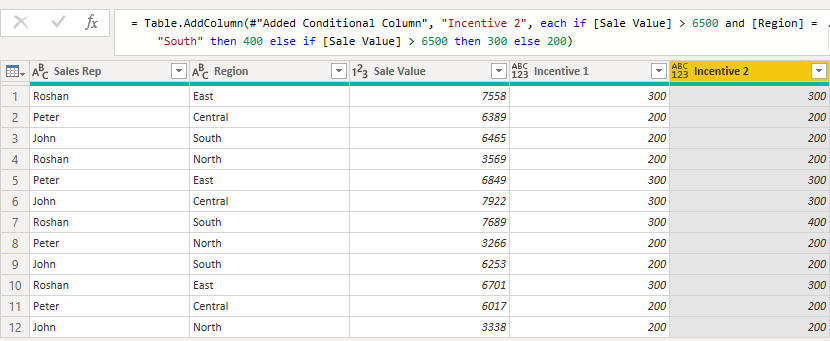
- To see the difference of this Incentive column look at row number 7 where sales value is > 6500 and region is “South” so the Incentive value is 400.

- Once the changes are applied click on “Close and Apply” under the Home tab.
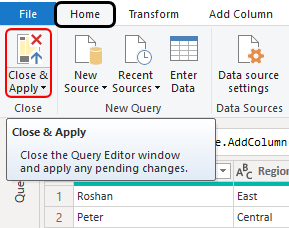
Now we have new columns with an older column in the Power BI Data Model.
Things to Remember
- IF is available as statement and DAX function in Power BI.
- In a statement, all the syntax should be in lower case characters, if any upper case included formula will show error and you can close out the formula.
Recommended Articles
This is a guide to Power BI IF Statement. Here we discuss how to use If statement in Power BI to arrive new column along with practical examples. You may also look at the following articles to learn
- Get link
- X
- Other Apps
Comments
Post a Comment